
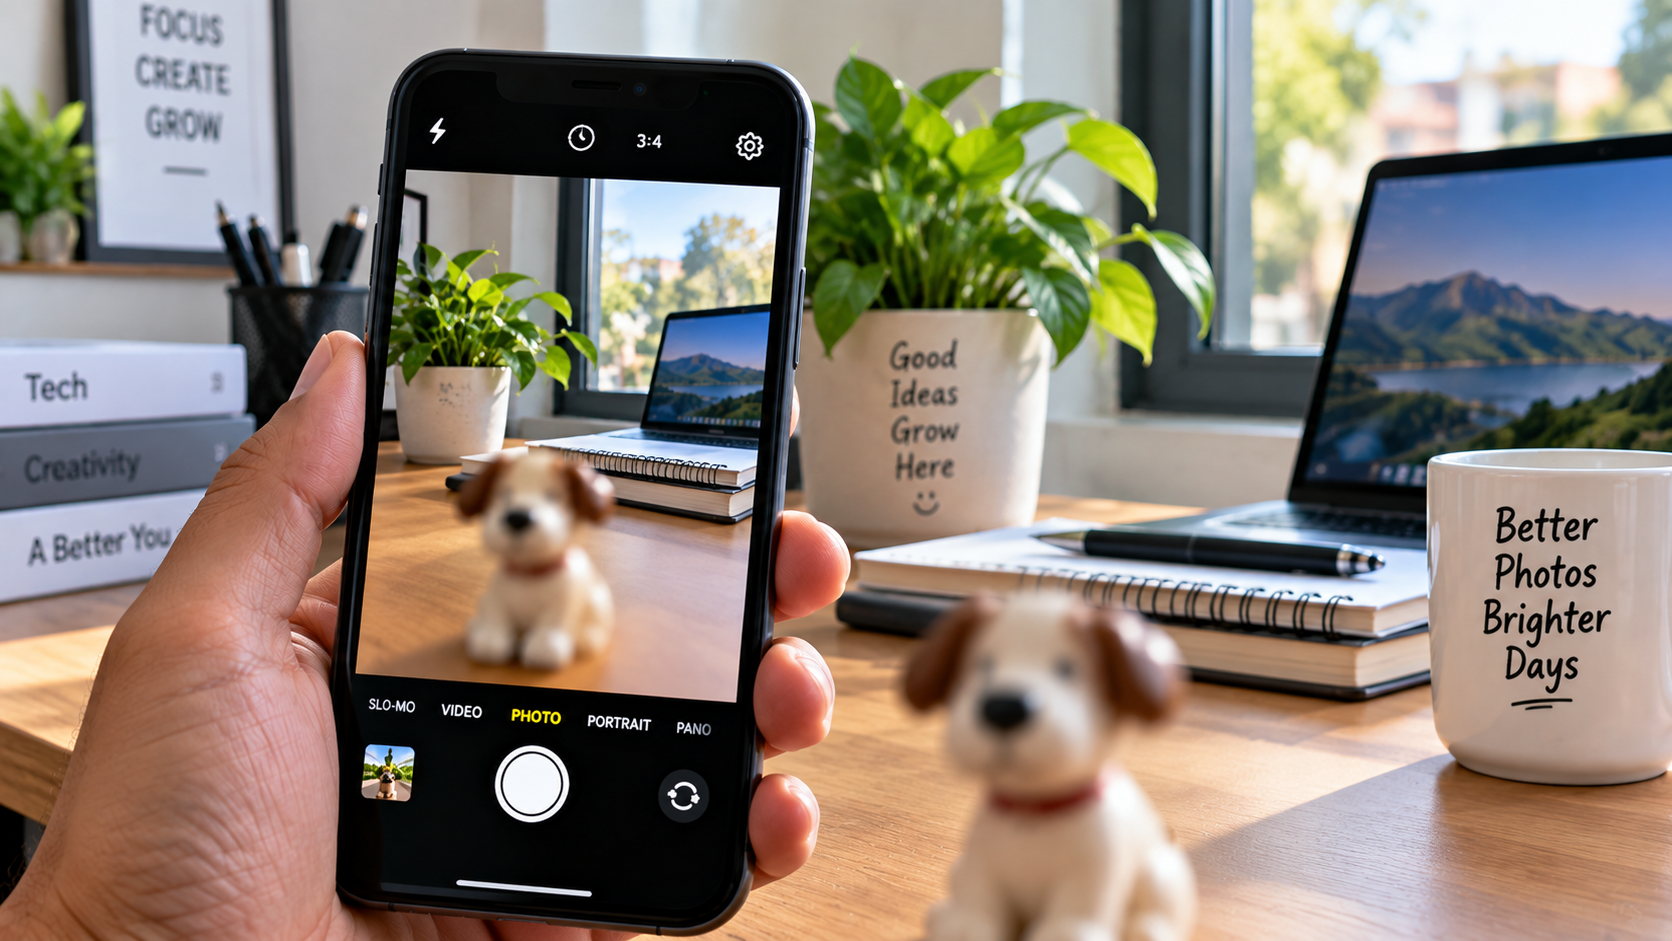
A smartphone camera can produce a photo that looks perfectly fine in the viewfinder and then disappoint you the moment you open it in the gallery. The subject may be soft, the background may look strangely blurred, the image may be much darker than expected, or the camera may suddenly refuse to focus at all. Smartphone camera problems don’t have one universal cause. Focus, movement, exposure, lenses, accessories, image processing, storage, apps, software, and hardware can all play a role.
The good news is that you don’t have to immediately assume the camera module is broken. A few controlled tests can often narrow down what’s happening. The trick is to diagnose the symptom before changing a dozen settings at once.
Quick diagnosis: what kind of camera problem are you seeing?
Before changing settings, identify the symptom. A phone that produces a blurry photo has a very different problem from one that cannot launch the Camera app.
| What you’re seeing | Possible causes | First thing to test |
|---|---|---|
| Subject is blurry | Focus, movement, shooting distance | Photograph a stationary object in good light |
| Entire image is blurry | Camera shake, lens obstruction, hardware or processing | Clean the lens and keep the phone still |
| Photo is too dark | Exposure, lighting, HDR or camera settings | Test in brighter light |
| Photo is too bright | Overexposure or strong light | Tap the subject and adjust exposure if available |
| Night photos are smeared | Long exposure, subject movement or camera movement | Keep the phone completely still |
| Close-up looks soft | Minimum focusing distance or lens switching | Move the phone farther away |
| Camera won’t open | App error, software issue, storage or hardware | Restart the phone |
| Camera app crashes | Temporary app error, software conflict or corrupted data | Restart and update |
| Photos look different after capture | Computational photography and image processing | Compare preview with saved image |
| Photos cannot save | Insufficient storage or app/system issue | Check available storage |
The table is a starting point, not a diagnosis. Camera behavior varies by phone model and software version.
Why is my phone camera blurry?
“Blurry” is one of the most useful descriptions a reader can give you – but it still isn’t specific enough to identify the cause.
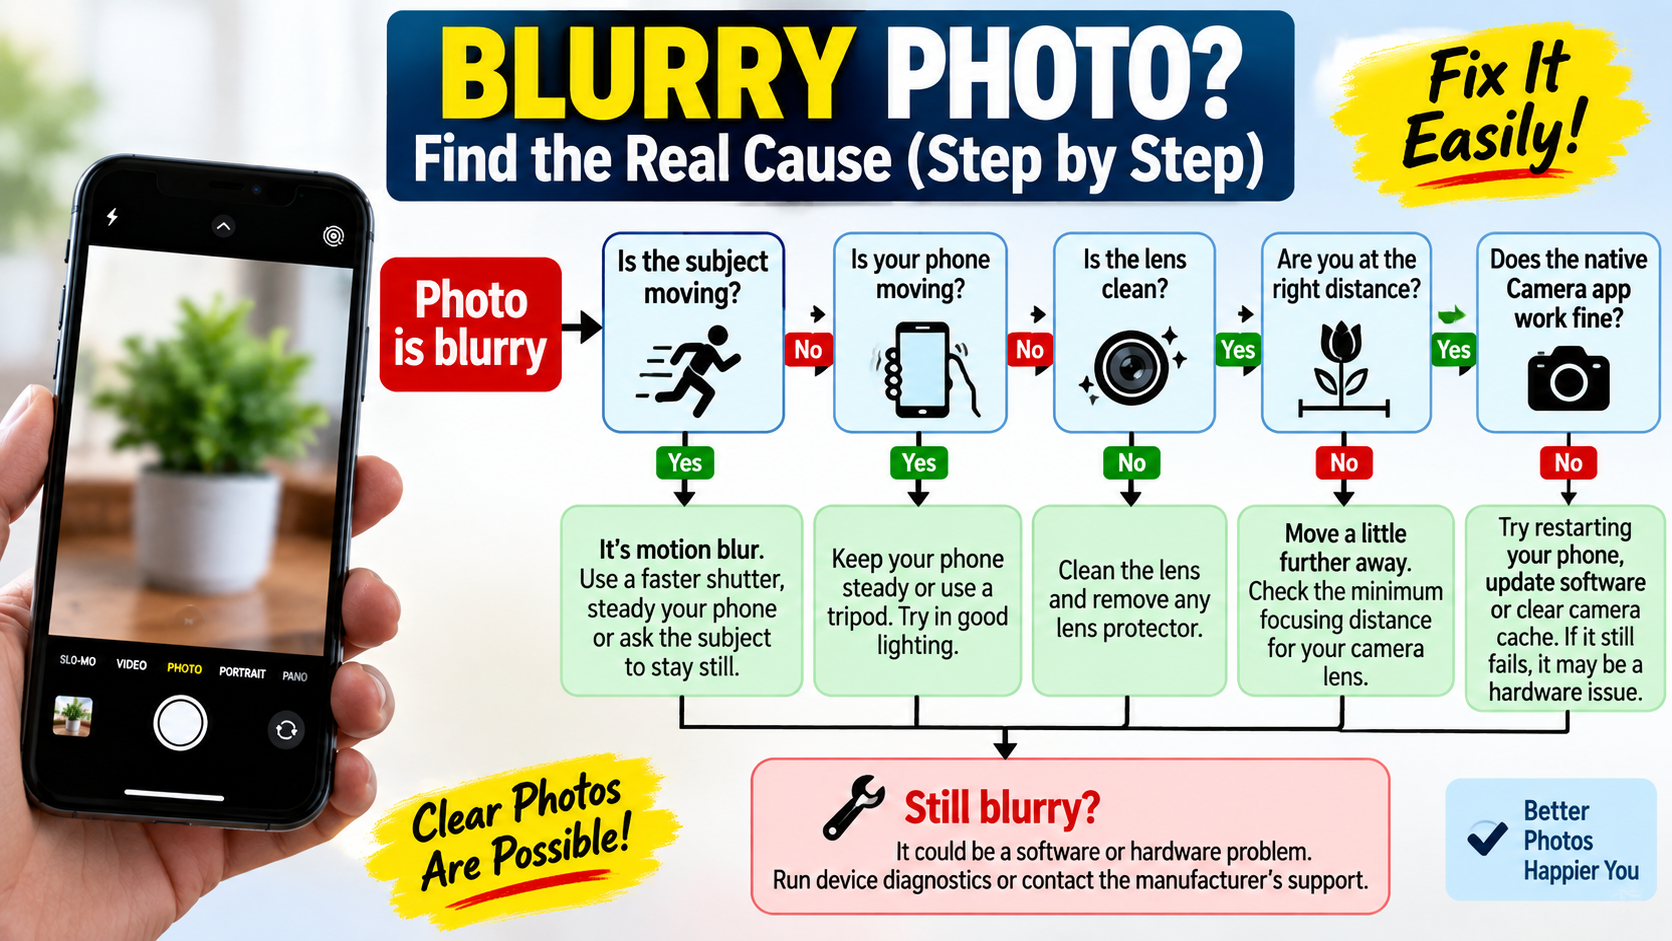
A blurry photo can result from missed focus, subject movement, camera movement, shooting too close, a dirty lens, an obstructing lens protector, low-light conditions, or processing behavior.
Google’s Pixel support documentation, for example, recommends cleaning the camera lens when photos or videos look blurry or hazy or when the camera won’t focus. Samsung likewise lists dirty lenses, accessories, shooting distance, camera settings, and environmental conditions among possible causes of poor image quality.
The camera focused on the wrong thing
Modern smartphone cameras usually try to determine which part of the scene should be sharp. If there are several objects at different distances, the camera may not choose the subject you intended.
Imagine photographing a person standing behind a fence. You tap the person’s face, but the camera locks onto the fence instead. The result can look like a defective camera even though the autofocus system is simply prioritizing a different part of the scene.
On supported Pixel devices, tapping a subject can direct autofocus toward that subject, and some models allow focus and exposure to be locked.
The subject moved
You can hold your phone perfectly still and still get a blurry photograph.
Why? Because the subject may have moved while the image was being captured.
A person’s moving hand, a running child, a pet turning its head, or a passing vehicle can all create motion blur. The faster the movement and the longer the exposure, the more noticeable the blur can become.
This is particularly important in dim environments, where the camera may need more time to gather enough light.
You moved the phone
The opposite problem is camera shake.
If the phone moves while the exposure is being made, details throughout the frame can become soft. This is different from autofocus failure because the blur can affect much of the image rather than one incorrectly focused area.
Optical or electronic stabilization can reduce some movement, but stabilization isn’t magic. It cannot make a fast-moving subject perfectly sharp in every situation.
You were too close
Every camera system has practical focusing limits.
Move a phone too close to a subject and the main camera may no longer be able to focus properly. Some phones respond by switching to an ultra-wide or macro-oriented camera.
Samsung’s current Galaxy documentation specifically describes close-focus behavior, including Focus enhancer on supported devices, and notes that high zoom can switch to a telephoto camera whose minimum focusing distance may make very close subjects appear out of focus.
So if a close-up suddenly looks soft, don’t immediately conclude that the autofocus system has failed. Move the phone slightly farther away and try again.
Your lens protector may be the culprit
Camera lens protectors are easy to overlook because they are physically small and often remain on the phone for months.
But if a protector is poorly fitted, scratched, dirty, or optically unsuitable, it can interfere with image quality or create unwanted light effects. Samsung explicitly warns that camera protectors or lens covers can cause focus problems or light distortion.
A simple test is to remove the protector temporarily and photograph the same stationary subject under the same lighting.
Focus problems vs motion blur: how can you tell?
This distinction saves a lot of unnecessary troubleshooting.
A focus problem often looks like this:
- Your intended subject is soft.
- Another part of the scene appears sharper.
- Tapping the subject doesn’t reliably improve focus.
- The problem can happen even when everything in the scene is stationary.
Motion blur often looks like this:
- Moving subjects show smearing.
- Edges can appear stretched or duplicated.
- The problem is worse in low light.
- A stationary object may look sharp when photographed under better lighting.
Try this simple test
Put a stationary object on a table.
Then:
- Go somewhere with good lighting.
- Clean the camera lens.
- Hold the phone steady.
- Tap the object on the screen.
- Take several photos.
- Move the phone slightly farther away and repeat.
If the stationary object is consistently out of focus despite good lighting and clean lenses, you have a stronger reason to investigate software or hardware.
If it becomes sharp under these controlled conditions, the original problem may have been related to movement, distance, lighting, or camera selection.
Why are smartphone photos too dark or too bright?
Not every bad-looking photograph has a focus problem. Sometimes the camera has captured the scene with the wrong exposure.
Exposure determines how much light appears in the captured image.
A photo that is underexposed looks too dark, while an overexposed photo can lose detail in bright areas and appear washed out.
Bright backgrounds can fool the camera
Consider a person standing in front of a sunny window.
The camera sees a very bright background and a comparatively darker face. Depending on the phone and camera mode, it may prioritize the overall scene, the face, or another part of the frame.
The result can be a face that looks too dark even though the window is correctly exposed.
Exposure isn’t just a brightness slider
On phones that provide manual or semi-manual controls, exposure can involve settings such as shutter speed and ISO. On simpler camera apps, the phone handles these decisions automatically.
Samsung’s support documentation notes that exposure controls can be used to adjust how bright or dark a photo appears, although the available controls vary between devices and software versions.
What about HDR?
HDR, or high dynamic range processing, is designed to help cameras handle scenes containing both very bright and very dark areas.
Rather than treating HDR as a simple “better photo” switch, explain it as a way of managing difficult lighting conditions.
For example, a landscape with a bright sky and a shaded foreground contains a large brightness range. Computational processing can help retain information across those areas, although the final appearance depends on the phone’s software and the scene.
Why are night photos blurry even when the phone is still?
Night photography is where many smartphone camera problems become confusing.
You can stand completely still, press the shutter carefully, and still get a photograph that isn’t as sharp as you expected.
The reason is simple: low light makes photography more demanding.
A camera may need to use a longer exposure to gather enough light. During that time, even small movement can become visible.
Apple explains that Night mode can take several seconds depending on the darkness of the scene and recommends keeping the iPhone steady until capture finishes.
The subject can move too
This is the part people often forget.
Suppose you’re photographing a friend at night. You keep the phone steady, but your friend turns their head.
Your hands weren’t the problem. The subject moved during the exposure.
That’s why a city skyline can look sharp in Night mode while a moving person in the same photograph looks soft.
Night mode isn’t the same as a normal daytime photo
Night photography can involve different combinations of exposure, sensitivity, stabilization and computational processing.
The exact behavior depends on the phone.
Google’s Pixel documentation, for example, includes dedicated low-light controls and focus options for night photography.
When the lens is clean but the photo still looks soft
Sometimes the photograph is technically in focus but still doesn’t look as detailed as you expected.
That’s where image processing enters the conversation.
Modern smartphones don’t simply record whatever reaches the camera sensor and immediately save it unchanged. Software can process captured image data to adjust brightness, color, dynamic range, noise and perceived detail.
Noise reduction can remove fine detail
Low-light images often contain noise.
Software can reduce that noise, but aggressive noise reduction can also smooth small textures.
Hair, leaves, fabric and distant surfaces are examples of details that can be affected by image processing.
Sharpening can change the appearance of detail
Phones can also apply sharpening to make edges appear more defined.
A little sharpening can make a photograph look crisp. Too much can create unnatural-looking edges or halos.
The important point is not that processing is “bad.” It is that the final photograph is partly a computational result, not simply an untouched sensor recording.
HDR and multi-frame processing
Some smartphone cameras combine information from multiple frames or apply computational techniques to improve difficult scenes.
This can produce a final image that looks different from the live preview.
That’s one reason you may occasionally think:
“That wasn’t what I saw when I pressed the shutter.”
The difference isn’t necessarily a malfunction.
Computational photography can change the final image
Computational photography is the use of software algorithms to process camera data and produce the final photograph.
It can influence exposure, dynamic range, noise, color, detail and other aspects of the image.
The exact algorithms are manufacturer- and model-specific, so avoid claiming that every phone processes images in exactly the same way.
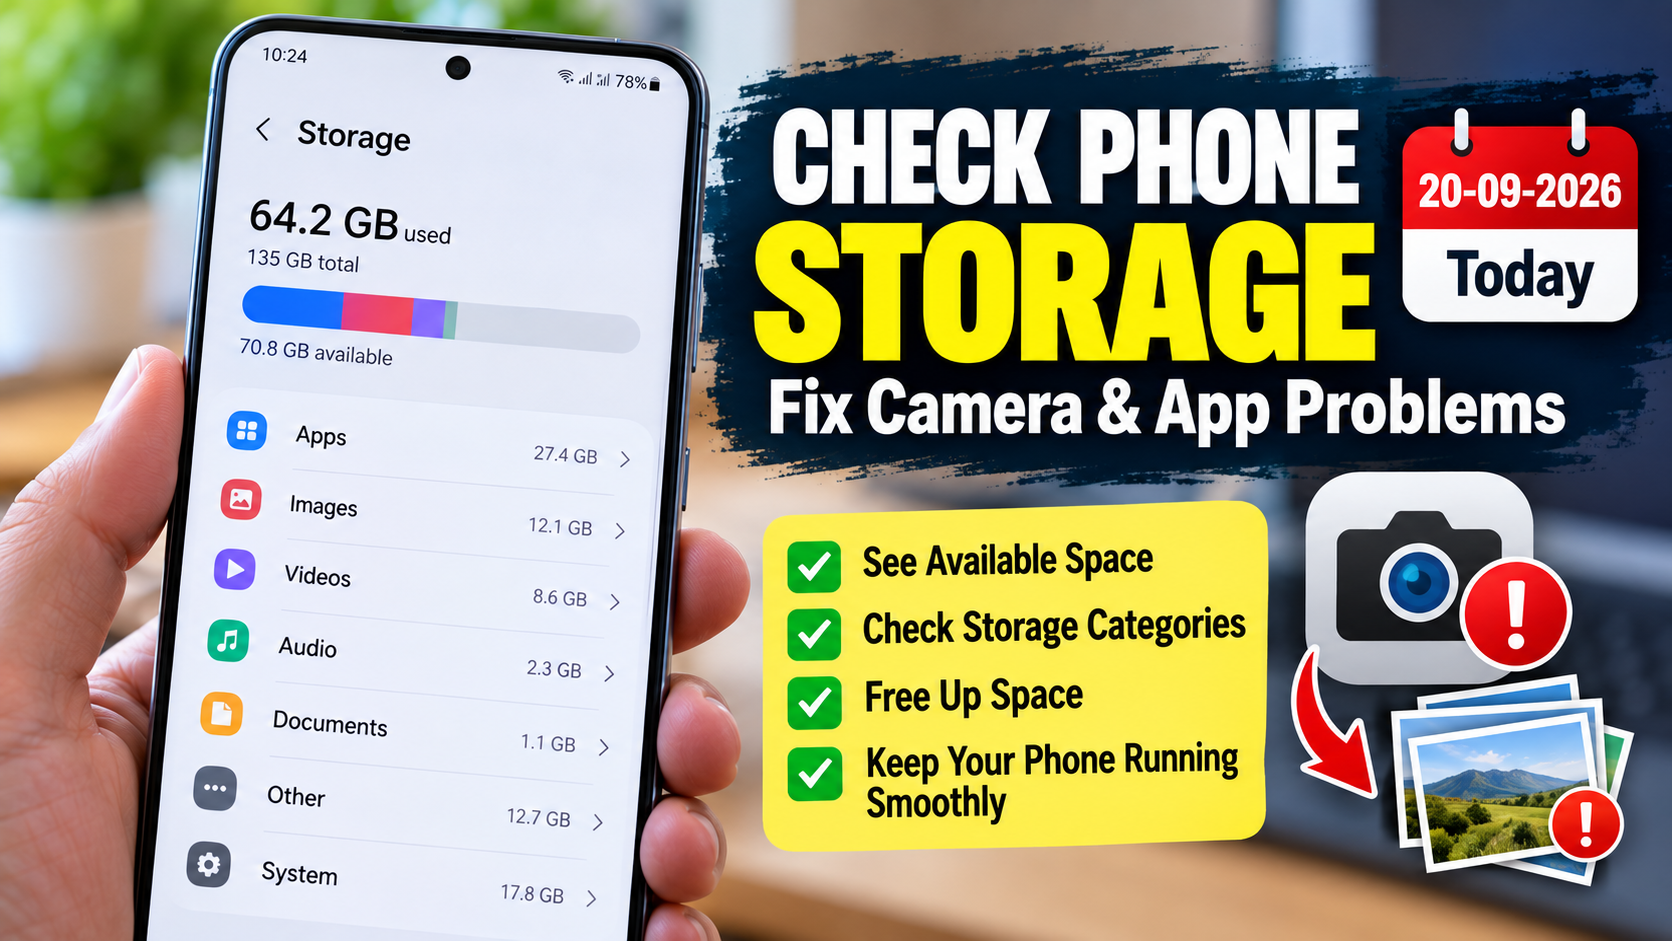
Can low storage cause smartphone camera problems?
Yes, but this needs some nuance.
Low storage can create camera-related problems, but it should not automatically be blamed for blurry photographs.
If your phone is nearly full, the more obvious camera-related symptom is difficulty saving new photos or videos. Some devices can also experience broader performance problems when resources are constrained.
Samsung’s support material specifically advises checking available storage when dealing with camera-app problems, while its broader device guidance notes that insufficient available resources can contribute to slow or unresponsive behavior.
Check your available storage
Look for:
- Large videos
- Downloads
- Offline media
- Unused applications
- Duplicate files
- Old screen recordings
- Camera backups that haven’t been moved or managed
Don’t delete photos blindly just because the camera is behaving strangely. Back up important files first.
When the Camera app itself is the problem
Sometimes the camera hardware is perfectly fine and the application controlling it is having a bad day.
Typical symptoms include:
- Camera app freezes.
- Camera won’t open.
- The preview becomes stuck.
- The app crashes.
- The camera works after restarting.
- A third-party app cannot access the camera.
Restart before doing anything complicated
It sounds almost too simple, but a restart can clear temporary software problems.
Samsung’s current troubleshooting guidance recommends restarting a Galaxy device for temporary Camera app errors and provides additional steps if the problem continues.
Clear the Camera app cache or data carefully
On Android devices that provide these controls, clearing an app’s cache can remove temporary data.
Clearing app data is a bigger step because it can reset application settings.
Samsung says clearing Camera app data resets camera settings to their defaults while saved photos and videos are not deleted. However, Android menus and behavior vary, so readers should follow instructions for their specific device.
Keep the phone software updated
Software updates can contain bug fixes, compatibility changes and camera improvements.
But don’t assume every update will improve camera quality. The useful editorial point is simpler: if a camera problem began after a software change, check the manufacturer’s support information for that version and install available corrective updates when appropriate.
What if the camera works in one app but not another?
This is a valuable diagnostic clue.
If the native Camera app works correctly but Instagram, WhatsApp, Snapchat or another application produces an error, the camera hardware may not be the immediate problem.
The issue could involve:
- App permissions
- App compatibility
- Software bugs
- Camera API behavior
- A third-party application conflict
Samsung recommends testing for third-party app interference when investigating some camera focus issues.
Apple also documents cases where non-genuine or improperly installed camera components can cause problems specifically in third-party camera apps, including freezing, quitting unexpectedly or blank previews.
That doesn’t mean every third-party camera problem indicates a hardware fault. It means the difference between apps is itself useful evidence.
What camera problems are more likely to be hardware-related?
Software troubleshooting has limits.
If the camera remains faulty after reasonable controlled testing, physical damage or a camera-module problem becomes more plausible.
Watch for symptoms such as:
- A cracked camera lens
- Persistent condensation inside the camera
- Autofocus that never locks under normal conditions
- A camera that consistently produces abnormal artifacts
- A camera that stopped working after physical damage
- A problem that appeared immediately after a repair
- Camera failure across multiple applications
Don’t open the phone yourself simply because an online guide suggests that a component might be defective.
Apple recommends trained technicians and genuine camera parts for iPhone camera replacement and warns that nongenuine parts can lead to focus, image-quality and compatibility problems.
A strange camera rattle isn’t automatically a failure
One useful example of why symptoms need context comes from Google Pixel support: some Pixel models have camera components that can make a slight rattling sound when the phone is shaken, and Google identifies this as normal behavior for those models.
So don’t diagnose hardware failure from one unusual sound alone. Check the manufacturer’s documentation for your specific model.
The 10-minute smartphone camera diagnostic
If you want a practical sequence rather than a list of random fixes, work through these tests in order.
1. Clean every camera lens
Use a soft, clean cloth. Fingerprints and dust can make a lens look surprisingly hazy.
Google specifically recommends cleaning the lens when Pixel photos look blurry or hazy or when the camera won’t focus.
2. Temporarily remove a camera lens protector
If you use one, remove it for testing.
If image quality suddenly improves, you’ve found an important clue.
3. Photograph a stationary object
Use a book, bottle or another object that isn’t moving.
This removes subject motion from the equation.
4. Test in good daylight
Don’t diagnose a camera using a dark room.
Give the camera enough light to focus and expose the scene normally.
5. Tap the subject to focus
Watch what changes in the preview.
If your phone provides a focus lock, use it when appropriate.
6. Try another camera
If your phone has multiple rear cameras, test the main, ultra-wide and telephoto cameras separately where available.
A problem affecting only one camera can provide a useful clue.
7. Compare the native Camera app with another app
If the native app works but another application doesn’t, investigate the application rather than immediately blaming the camera module.
8. Restart the phone
This is especially worthwhile if the Camera app is freezing or refusing to launch.
9. Check software and storage
Make sure the phone has adequate free space and check for available system/app updates.
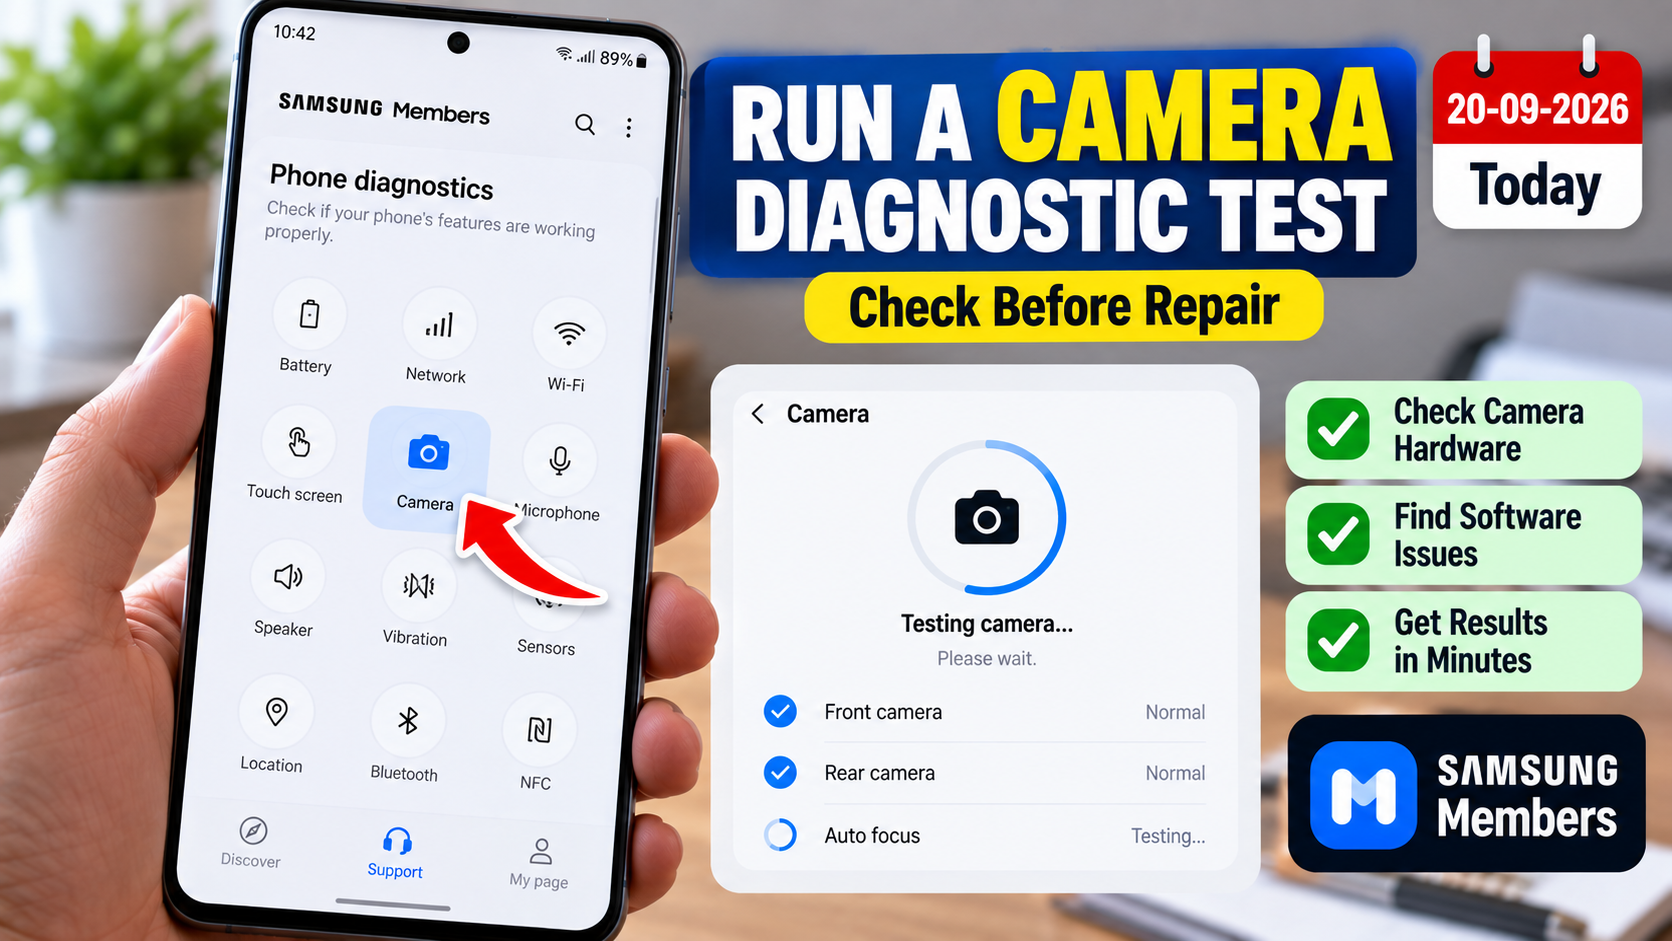
10. Run manufacturer diagnostics when available
Samsung, for example, provides camera diagnostics through Samsung Members on supported Galaxy devices.
Camera troubleshooting mistakes that waste time
Changing five settings at once
If you change exposure, HDR, focus mode, resolution and zoom simultaneously, you won’t know which change helped.
Change one variable at a time.
Testing only in difficult conditions
A camera that struggles at night isn’t necessarily defective.
Test it in good daylight first.
Assuming every blur is autofocus
Blur can come from subject movement or camera shake.
Ignoring the camera protector
A protector can be easy to forget because it is always attached to the phone.
Comparing different lenses without considering distance
A telephoto lens isn’t necessarily designed to focus at the same distances as the main camera.
Clearing app data without understanding the consequence
Resetting camera settings may be useful, but understand what the reset does before tapping the button.
Blaming storage for poor image quality
A full phone can cause storage or application problems, but that doesn’t mean it explains every soft photograph.
Pros and cons of troubleshooting camera problems yourself
Pros
- You can identify simple causes without immediately visiting a service centre.
- Controlled testing can separate focus, movement and software issues.
- You may discover that an accessory is affecting image quality.
- Manufacturer diagnostics can provide additional information on supported devices.
- A clear diagnosis can make a later repair conversation more productive.
Cons
- Camera menus differ substantially between manufacturers and models.
- Some symptoms overlap, especially in low-light photography.
- Computational photography makes image-quality problems harder to diagnose from appearance alone.
- Software troubleshooting cannot conclusively identify every hardware fault.
- Opening or repairing a modern smartphone without the appropriate equipment can create additional damage.
The goal isn’t to become a phone repair technician. It’s to gather enough evidence to understand what kind of problem you’re dealing with.
Frequently Asked Questions
Why is my phone camera suddenly blurry?
Start with the simplest possibilities: clean the lens, remove any camera protector, photograph a stationary object in good lighting, and tap the subject to focus. If the problem remains consistent across controlled tests and multiple camera apps, further software or hardware diagnosis may be appropriate. Google and Samsung both recommend lens cleaning as an early troubleshooting step for blurry or unfocused camera output.
Why does my phone camera struggle to focus?
Common possibilities include a dirty lens, an incorrect focusing distance, camera accessories, software problems, autofocus settings, or interference from another application. The exact cause depends on the phone model. Samsung’s current guidance specifically identifies dirty lenses, software glitches, tracking autofocus and third-party app interference as possible causes on Galaxy devices.
Why are my night photos blurry even when I hold the phone still?
Low-light photography can require longer exposures. That means the subject can move even if the phone doesn’t. Apple notes that Night mode captures can take several seconds depending on the scene and recommends keeping the iPhone steady until capture is complete.
Can low storage affect the camera?
Low storage can contribute to problems such as difficulty saving photos or camera-app errors, and insufficient available resources can affect overall device performance. However, low storage should not automatically be blamed for blurry photographs. Check the available storage and test the camera under normal conditions before drawing a conclusion.
Why does my photo look different after I take it?
Smartphone cameras apply image processing to captured data. Depending on the device, this can affect exposure, dynamic range, noise, color and perceived detail. Computational photography can therefore make the saved image look different from the live preview.
How can I tell whether my phone camera has a hardware problem?
A hardware problem becomes more worth investigating when a camera consistently fails under controlled conditions, remains faulty across camera apps, shows physical damage or develops problems after a repair. Manufacturer diagnostics and official service channels can provide a more reliable diagnosis than appearance alone.
What to do next
Don’t start by resetting everything.
Start with a controlled photograph.
Clean the lens. Remove the protector. Use good lighting. Photograph something stationary. Tap to focus. Keep the phone still. Then compare the result.
If the photo is sharp, the original problem probably involved the shooting conditions, movement, focus distance or accessories.
If it is still consistently blurry, test another camera, another app and the manufacturer’s diagnostic tools where available. If the problem survives those checks, professional service becomes a more sensible next step.
Conclusion
A smartphone camera problem is rarely solved well by guessing.
A blurry image could be a focus problem, but it could just as easily be movement, shooting distance, a dirty lens, an accessory, low light or image processing. A camera that refuses to open could be experiencing a temporary app error rather than a failed camera module.
The most useful approach is to isolate the variables: clean the lens, remove accessories, use a stationary subject, test in good light, try another camera or app, restart the phone, check storage and software, and use official diagnostics when available.
If the problem disappears during those tests, you’ve learned something valuable. If it doesn’t, you now have much better evidence to take to the manufacturer’s support team or a qualified repair provider.
In other words, don’t replace a camera just because one photo looks terrible. Diagnose the problem first.




1 thought on “Smartphone Camera Problems: How to Fix Focus, Blur, Exposure & Software Issues 2026”